Once upon a time, there was a Front-end developer who didn't know about State Charts and had a very "simple" task: build an input component. The "simple" input for editing a name had a few state variations:
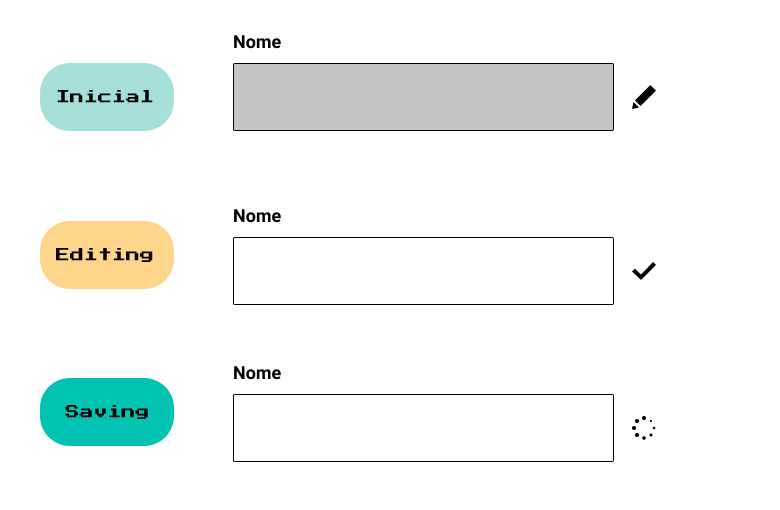
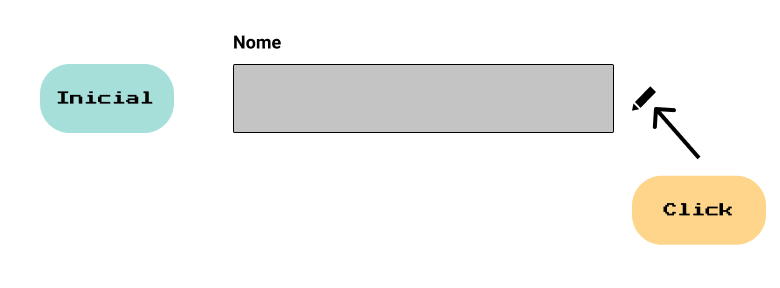
initial: The input appears disabled, the user can click on the edit icon.
editing: The input is enabled to receive the new name value, the user can then click on the save icon.
saving: Instead of the edit/save icons, we show a loading indicator signaling that some asynchronous action is happening - in this case, we're saving the new name value.
Our dear Front-end developer started the implementation with two boolean variables:
isEditing = false
isSaving = false
And an onClick function that received isEditing and isSaving as parameters. Their thinking was: The first time the onClick function is called, we're in the initial state, so I need to send the user to the editing state:
function onClick(isEditing, isSaving) {
  if(!isEditing && !isSaving) {
    isEditing = true;
  }
}
When reaching the editing state and knowing that the user could click again on the icon (which now transforms into the save icon), they continued the implementation by adding another piece of code to the onClick function:
function onClick(isEditing, isSaving) {
if(!isEditing && !isSaving) {
isEditing = true;
}
if(isEditing) {
isEditing = false;
isSaving = true;
saveName()
.then(() => {
isSaving = false;
isEditing = false;
})
}
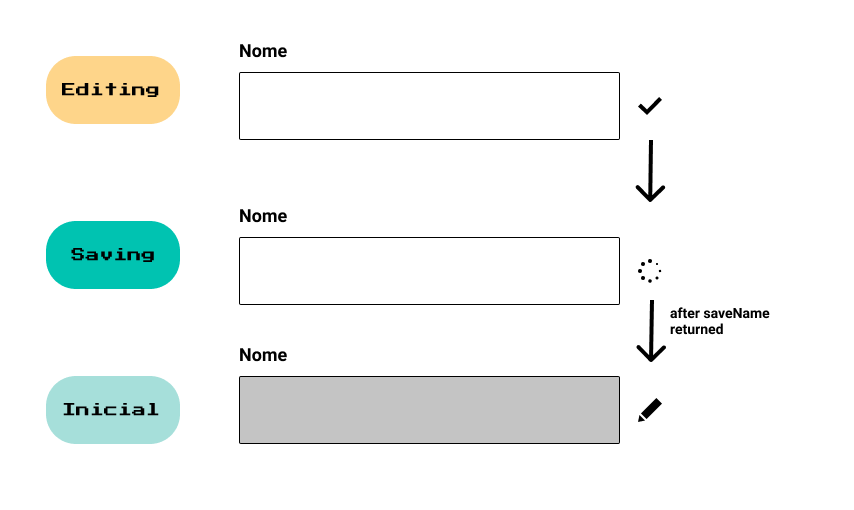
}The added code first checks if the user is in the editing state. If true, it switches the variables to move the user to the saving state, and then makes an API request to save the new name value. When receiving a response from the API, we reset both boolean variables to false, since now the user is neither editing nor saving a new value, which supposedly would move the user to the initial state.
Not very confident in the solution, they marked the task as done and moved on.

...Once upon a time, there was a designer who forgot to work on the error state of the "simple" input component.
"Hey dev, I forgot a detail, we didn't handle the input's error state. When there's an error, go back to the editing state because the client can try to save again."
Even knowing the current solution wasn't ideal, they continued with the same implementation to add the error state. Now, instead of 2 boolean variables, there would be three:
isEditing = false
isSaving = false
isError = false
This small addition resulted in the onClick function below:
function onClick(isEditing, isSaving, isError) {
  if(!isEditing && !isSaving) {
    isEditing = true;
  }

  if(isEditing) {
    isEditing = false;
    isSaving = true;
    isError = false;

    saveName()
     .then(() => {
       isSaving = false;
       isEditing = false;
     })
     .catch(() => {
       isError = true;
       isSaving = false;
       isEditing = false;
     })
  }
}
Task completed again. Uncomfortable with the final solution, they went to research. After all, what's the problem with boolean variables?
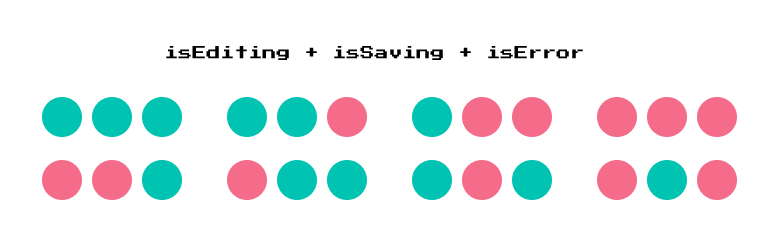
The problem is, as shown in the image above, although it seems harmless and obvious, 1 boolean variable represents two variations. The catch that nobody remembers is that by adding more variables, variations grow exponentially. With three boolean variables as in the example above, we have 8 variations.
So, do you think the code above is prepared to handle 8 variations? The answer unfortunately is: no. Your code may seem simple and be 99% vulnerable to bugs.

Knowing this, we can do it differently. We can map all states in a constant:
const stateType = {
  'IDLE': 'IDLE',
  'EDITING': 'EDITING',
  'SAVING': 'SAVING',
  'ERROR': 'ERROR'
};
We can also create an object that tells us the current state and the next state, for example:
 const nextState = {
   [stateType.IDLE]: stateType.EDITING,
   [stateType.EDITING]: stateType.SAVING,
   [stateType.SAVING]: {
     success: stateType.IDLE,
     error: stateType.ERROR
   },
   [stateType.ERROR]: stateType.SAVING
 }
We then limit the input state to only ONE state at a time:
inputState = stateType.IDLEAnd our onClick function would receive only our current state as a parameter, and using the nextState object, we would know which state we should move our component to. Example:
function onClick(currentInputState) {
  if(currentInputState === stateType.EDITING) {
     saveName()
     .then(() => currentInputState === nextState[stateType.saving].success)
     .catch(() => currentInputState === nextState[stateType.saving].error)
  } else {
	  currentInputState = nextState[currentInputState];
  }
}
We can summarize our story in problem and solution:
Problem:
Maintaining state using conditional variables became confusing, besides requiring handling all edge cases and praying that the state wouldn't fall into possible combinations that weren't handled.
Solution:
Have a single state at a time and define transitions between states through an event.
Our solution has a name: Finite State Machines, but what exactly is Finite State Machines?
A Finite State Machine (FSM) is a mathematical model used to represent computer programs or logic circuits. The concept is conceived as an abstract machine that must be in ONE of a finite number of states.
source: https://en.wikipedia.org/wiki/Finite-state_machine
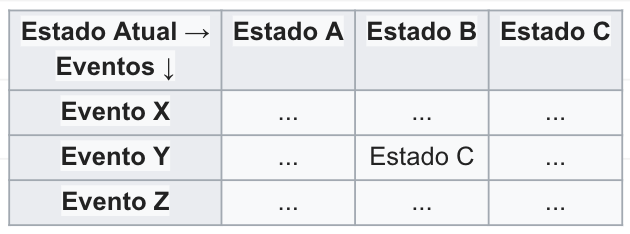
A very simple way to represent FSM is using a state transition diagram, where we can visualize the entire state transition flow, for example:
starting in state A ⇒ an event X happened ⇒ we go to state B
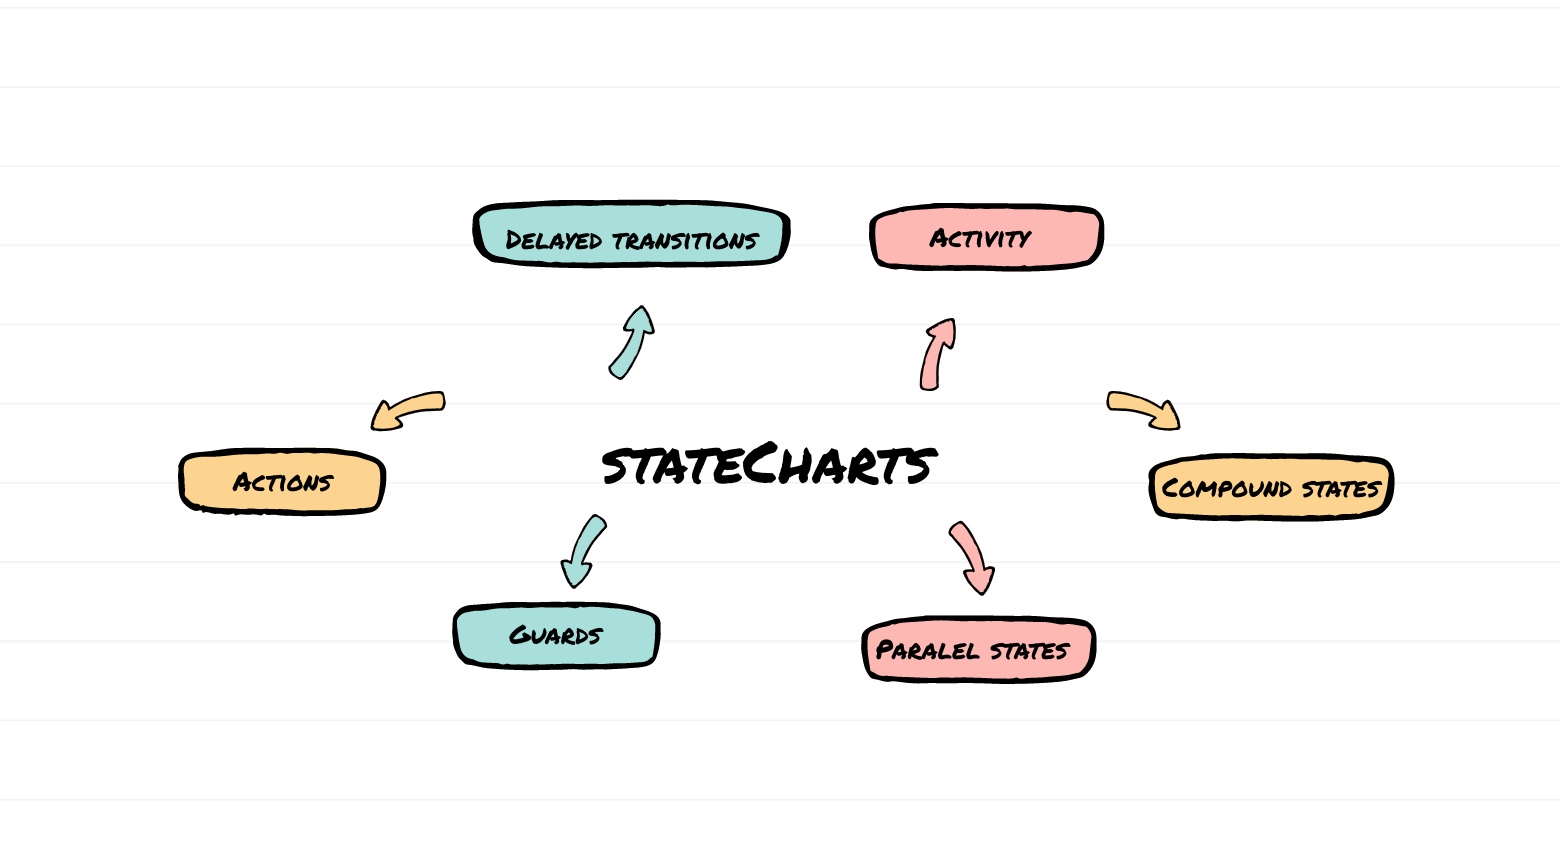
Finite State Machines? State charts? What's the difference?
When we start studying more about Finite State Machines, we will always come across another name which is State Charts, but what's the big difference between them?
Like any solution, Finite State Machines by themselves have some problems. They generally end up with a large number of states, many of them with identical transitions, making it very verbose and difficult to maintain. This is the famous problem known as state explosion.
State Charts, in turn, appeared shortly after, adding solutions so that FSM would be more scalable as your system grows and becomes more complex. Along with new ideas to make your life easier.
It's worth remembering that the idea was presented over 20 years ago, besides being one of the foundations of computing, it's widely used in embedded hardware and games! With the appearance of the Xstate library that we'll discover in the next post, usage on the web and especially with JavaScript is growing more and more. Just to give you a taste of what we'll see in the next article and also about one of the biggest advantages of using State Charts which is the power to visualize your code, take a look at how our input component code would look using Xstate:
https://xstate.js.org/viz/?gist=d73e129d583ac4a0ba956736e68dbdd2
Don't worry if you didn't understand the code, we'll learn everything about using Xstate and State Charts in a real application in the next article!
State? Is it like Redux?
When we work with State Charts, the famous states are not the dynamic states or data-related states of an application, but rather which scenario of a finite and pre-established possibility an application is in. Remember the golden rule: an application can be in ONE single state at a time. Example:
Your application can be in the loading state and have a context user=null, at the next moment your application would be in a logged-in state and have a context user={ id: 1, name: 'Diel' }. With this example, it's easy to understand that the state as we're used to in Redux or other options is called context in the world of statecharts.
See you in the next post, where we'll learn how to model an application using State Charts and Xstate.